learn more

Practical tips

Tips and tricks for the efficient application of Werth Messtechnik

The articles deal with questions from daily practice and offer interested parties condensed knowledge for solving their measuring tasks. With the help of examples, the metrology technician receives suggestions for target-oriented and time-saving operation with optimum measurement results.

Practical tips
Filter

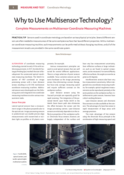
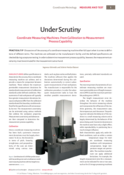
Optimal measurement with multi-sensor systems– Selection of sensors on multisensor coordinate measuring machines

<p>Different measurement sequences can be created semi-automatically using multisensor coordinate measuring machines and intelligent software processes to quickly solve complex measurement tasks. The machines enable combined measurements with different sensors and replace several single-purpose devices thanks to their flexibility. Thanks to their modular design, they can be upgraded to the latest state of the art at any time.</p>
File size: 2.71 MB
Output: QZ 2019/09
Optimal measurement with multi-sensor systems– Selection of sensors on multisensor coordinate measuring machines

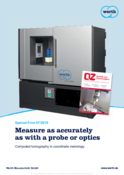
Measure as accurately as with probes or optics – Computed tomography in coordinate metrology

<p>Precise measurements with X-ray computed tomography (CT) initially required Autocorrection based on a reference measurement with a different sensor. In recent years, the measurement uncertainty has been significantly reduced by improving the device components and software. Today, the measuring accuracy of even compact coordinate measuring machines with CT is similar to that of machines with conventional sensors.</p>
File size: 2.39 MB
Output: QZ 2019/07
Measure as accurately as with probes or optics – Computed tomography in coordinate metrology

Bringing light into the detail – Image processing and focus variation on different surfaces

<p>For multisensor coordinate measuring machines with image processing and focus variation sensors, the contrast of the images of the workpiece surface is decisive for the measurement results. These can be optimised with various functions so that even less "cooperative" workpieces can be measured.</p>
File size: 3.66 MB
Output: QZ 2018/06
Bringing light into the detail – Image processing and focus variation on different surfaces

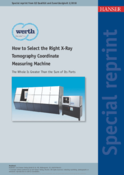
The whole is greater than the sum of its parts– How to choose the right X-ray tomography measuring machine

<p>In addition to high accuracy, the available resolution, the necessary measuring time and the measuring range are decisive for solving measuring tasks using coordinate measuring machines with X-ray tomography. The modular design of the machines allows you to select the X-ray tube, detector and basic unit as well as the machine software. This means that the machines can be customised to meet individual requirements.</p>
File size: 1.67 MB
Output: QZ 2018/02
The whole is greater than the sum of its parts– How to choose the right X-ray tomography measuring machine

Without changing devices – Complete measurement with multisensor coordinate measuring machines

<p>In coordinate metrology, sensors are used that are based on different physical principles. If several surface areas with different properties need to be measured on the same workpiece, several sensors are often required. With multisensor coordinate measuring machines, such measurements can be carried out without changing devices and all features can be linked in the same datum system.</p>
File size: 1.75 MB
Output: QZ 2017/12
Without changing devices – Complete measurement with multisensor coordinate measuring machines

Standard-compliant measurement with minimal rejects – Utilising the possibilities of the new ISO standard for profile deviations

<p>ISO 1101 (2017) has greatly expanded the drawing entries for tolerancing profile deviations. In order to utilise these possibilities, the measuring software must offer simple solutions for a wide range of measuring tasks. If the measurement not only complies with the standard but is also functional, this also reduces rejects.</p>
File size: 1.69 MB
Output: QZ 2017/10
Standard-compliant measurement with minimal rejects – Utilising the possibilities of the new ISO standard for profile deviations

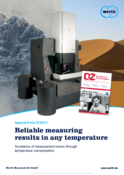
Reliable measurement results in any environment– Avoidance of measurement errors through temperature compensation

<p>Deviations from the reference temperature can cause large measurement errors. By capturing the temperature, the thermal effects on the coordinate measuring machine can be compensated for by calculation. This results in a much more cost-effective alternative to a highly accurate air-conditioned laboratory.</p>
File size: 1.65 MB
Output: QZ 2017/07
Reliable measurement results in any environment– Avoidance of measurement errors through temperature compensation

On the test bench – Coordinate measuring machines: from qualification to measurement process capability

<p>Discussions about the accuracy of a coordinate measuring machine often fail at the definition of the different terms. The machines are calibrated by the manufacturer and the defined specifications are checked as part of the acceptance process. To determine the measurement process capability, the measurement uncertainty must be estimated for the respective measurement task.</p>
File size: 1.78 MB
Output: QZ 2017/02
On the test bench – Coordinate measuring machines: from qualification to measurement process capability

Tactile and optical measurement – Which sensor is suitable for which workpiece

<p>Coordinate measuring machines with image processing sensors are particularly suitable for the rapid measurement of workpieces such as profiles or 3D plastic parts. Conventional touch probes are mostly used to determine geometry and 3D position deviations on larger cubic workpieces. With multisensor coordinate measuring machines, many workpieces can be measured completely and in one set-up.</p>
File size: 1.63 MB
Output: QZ 2016/12
Tactile and optical measurement – Which sensor is suitable for which workpiece

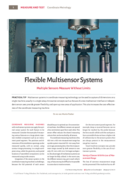
Flexible multi-sensor systems – Measure with multiple sensors without restrictions

<p>With multi-sensor coordinate metrology, all sizes can be determined with just one machine and usually without reclamping. Innovative concepts such as the use of multi-sensor systems or independent sensor axes offer even more flexibility and open up further areas of application. The cost-effectiveness of the coordinate measuring machine is also increased.</p>
File size: 1.6 MB
Output: QZ 2016/10
Flexible multi-sensor systems – Measure with multiple sensors without restrictions

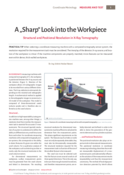
A sharp view into the workpiece – Structural and spatial resolution in X-ray tomography

<p>When selecting a coordinate measuring machine with computed tomography sensors, the resolution required for the measuring task must be taken into account. The interaction between the detector, the X-ray source and the position of the workpiece is crucial. If the device components are harmonised with each other, micro-features can also be measured on thick-walled workpieces made of dense materials.</p>
File size: 1.97 MB
Output: QZ 2016/08
A sharp view into the workpiece – Structural and spatial resolution in X-ray tomography

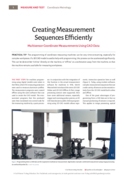
Efficient creation of measurement sequences – Multi-sensor systems for coordinate measurement with CAD data

<p>Programming coordinate measuring machines can be very time-consuming, especially for complex workpieces. If a 3D CAD model is used for programming, this process can be significantly accelerated. This can be done both "online" directly on the measuring machine and "offline" with a remote workstation, so the measuring machine remains available for measuring workpieces.</p>
File size: 1.61 MB
Output: QZ 2016/06
Efficient creation of measurement sequences – Multi-sensor systems for coordinate measurement with CAD data

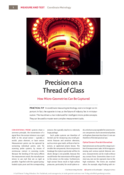
Precision on a glass thread – How micro-geometries can be captured

<p>Size does not always matter in coordinate metrology, quite the opposite: the industrial future lies in miniaturisation. Intelligent micro-probe concepts are therefore increasingly in demand. This means that even complicated measuring tasks can be mastered.</p>
File size: 1.65 MB
Output: QZ 2016/02
Precision on a glass thread – How micro-geometries can be captured

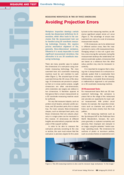
Avoid projection errors – Measurement of workpieces in two or three dimensions

<p>The inspection drawings of workpieces predominantly contain two-dimensional dimensional definitions, which often leads to the conclusion that the measuring task can be solved with 2D coordinate metrology. However, this requires precise mechanical alignment of the mostly three-dimensional workpieces. Otherwise, considerable measurement errors can hardly be avoided. Alternatively, 3D coordinate metrology can be used.</p>
File size: 1.53 MB
Output: QZ 2015/12
Avoid projection errors – Measurement of workpieces in two or three dimensions

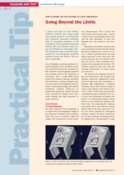
Beyond the limits – How to expand the use of X-ray tomography

<p>In coordinate metrology with X-ray tomography, it is often necessary to choose between sufficient resolution and sufficient measuring range. Both depend largely on the components of the coordinate measuring machine with X-ray sensors used. Methods for increasing resolution extend the application possibilities of X-ray tomography measuring machines beyond the limits of the device components.</p>
File size: 1.57 MB
Output: QZ 2015/10
Beyond the limits – How to expand the use of X-ray tomography

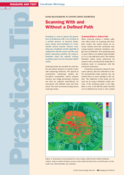
Non-predefined path scanning – Complete geometry detection with multi-sensor systems

<p>With scanning, workpieces with many points can be captured in a reliable manner, allowing size, mould and position to be measured in a functional manner. Contour tracking is realised by a control algorithm in the interaction between the sensors and the coordinate measuring machine. Scanning can be significantly accelerated by utilising information on the nominal contour.</p>
File size: 1.58 MB
Output: QZ 2015/08
Non-predefined path scanning – Complete geometry detection with multi-sensor systems

Functional testing with a virtual gauge – How to reduce rejects with a contour comparison

<p>Looking at individual measured values and simple shape and position tolerances without material conditions can lead to functional workpieces being rejected. Evaluation according to the maximum material principle and contour comparison with tolerance zone-dependent fitting offer possibilities for functional testing. This reduces rejects and makes production more economical.</p>
File size: 1.56 MB
Output: QZ 2015/06
Functional testing with a virtual gauge – How to reduce rejects with a contour comparison

Flexible zoom optics – Image processing sensor for every application

<p>An image processing sensor with zoom optics enables different magnifications and thus expands the application possibilities of the coordinate measuring machine. However, a change in magnification also affects the other parameters of the zoom lens. This must be taken into account when using such a lens.</p>
File size: 2.13 MB
Output: QZ 2015/02
Flexible zoom optics – Image processing sensor for every application

The application determines the sensors – Multi-sensor systems or computed tomography?

<p>Choosing the right metrology for dimensional measurement tasks is very important. Basically, the application determines the sensors. The following describes which aspects the user should consider when making a decision.</p>
File size: 1.66 MB
Output: QZ 2014/12
The application determines the sensors – Multi-sensor systems or computed tomography?

Comparison of distance sensors – Measurement of workpiece surfaces with optical sensors

<p>A large number of contact and non-contact sensors are available for the measurement of workpiece surfaces. The appropriate sensor is selected depending on the measuring task and the surface in question. The greatest flexibility is achieved with different sensors in one machine.</p>
File size: 1.56 MB
Output: QZ 2014/08
Comparison of distance sensors – Measurement of workpiece surfaces with optical sensors

Reduce costs with precise coordinate metrology – Measurement uncertainty in the area of conflict between customers and suppliers

<p>Flexible multi-sensor coordinate measuring technology with a choice of faster or more accurate sensors and machines is increasingly being used for incoming goods inspection and production monitoring of complex workpieces. As a result, the evaluation of measurement uncertainty is becoming increasingly important. Customers and suppliers should consider the interaction of tolerances and measurement uncertainties when shaping their cooperation.</p>
File size: 1.83 MB
Output: QZ 2014/04
Reduce costs with precise coordinate metrology – Measurement uncertainty in the area of conflict between customers and suppliers

Influencing parameters, capturing and optimising – Measuring accuracy in coordinate metrology

<p>A coordinate measuring machine is often used to measure workpieces that have tight manufacturing tolerances. The "accuracy" is of central importance here. Various categories are summarised under this term.</p>
File size: 2.07 MB
Output: QZ 2014/02
Influencing parameters, capturing and optimising – Measuring accuracy in coordinate metrology

Measurement "in the image" and "on the image" – What coordinate measuring machines with image processing can do

<p>Different device concepts can be used for coordinate measurement with image processing. But which machine is suitable for which measurement? This depends on the measurement task, the measurement uncertainty and the measuring speed.</p>
File size: 1.61 MB
Output: QZ 2013/12
Measurement "in the image" and "on the image" – What coordinate measuring machines with image processing can do
Contact
Select another country or region to see content in your language.