learn more

User reports

Information on the practical use of Werth coordinate measuring machines directly from the user

Werth Messtechnik user reports cover a wide range of industries and measuring tasks and open up the entire spectrum of metrology with optics, probes, computed tomography and multi-sensor systems to the reader.

User reports
Filter

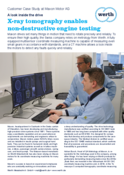
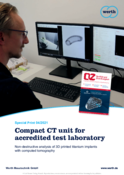
Compact CT machine for accredited testing laboratory - non-destructive analysis of 3D-printed titanium implants / CPM Diagnostics oHG

<p>In addition to dental implants, the CPM Group from Hirschberg also develops and manufactures 3D-printed titanium spinal implants. The accredited test laboratory CPM Diagnostics, which belongs to the group of companies, tests the structure of the workpieces using a compact computed tomography coordinate measuring machine</p>
File size: 1.9 MB
Issue: QZ 2021/04
Compact CT machine for accredited testing laboratory - non-destructive analysis of 3D-printed titanium implants / CPM Diagnostics oHG

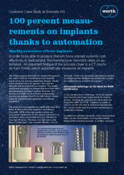
For 100 per cent safety – Production of brake systems with automated inline measurement / Continental Teves AG & Co. oHG

<p>Components for modern brake systems such as the electro-hydraulic MK C1 are produced at the Continental plant in Gifhorn. Its valve block with its complex bore structure requires 100 per cent inspection. A fully automated measuring cell integrated into the production process combines coordinate measuring systems with computed tomography (CT) and optical machines to ensure flexible measurement in a production cycle of less than a minute.</p>
File size: 4.33 MB
Issue: QZ 2020/04
For 100 per cent safety – Production of brake systems with automated inline measurement / Continental Teves AG & Co. oHG

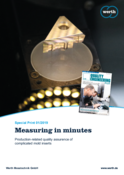
Measurement in minutes – Quality assurance close to production of complicated mould cutting plates / Mauth Werkzeug-Schleiftechnik GmbH

<p>For years, tool manufacturer Mauth had to allow more time for the measurement of complicated mould cutting plates than for their grinding process. The new Scope Check S 3D coordinate measuring machine from Werth Messtechnik has changed this. The measuring system, which is close to production, makes a significant contribution to increasing productivity.</p>
File size: 3.85 MB
Issue: QE 2019/01
Measurement in minutes – Quality assurance close to production of complicated mould cutting plates / Mauth Werkzeug-Schleiftechnik GmbH

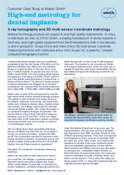
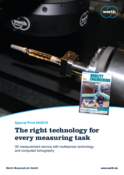
The right technology for every measuring task– 3D measuring service with multi-sensor systems and computed tomography / messtronik GmbH

<p>With increasing standardisation and the desire for ever more complete capture of workpieces, the demands on measurement service providers are growing. To fulfil these customer requirements, Messtronik now uses several multisensor and computed tomography coordinate measuring machines from Werth. These are also used to check the stability of tools.</p>
File size: 2.86 MB
Issue: QE 2018/04
The right technology for every measuring task– 3D measuring service with multi-sensor systems and computed tomography / messtronik GmbH

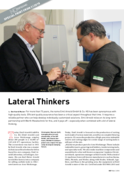
Lateral thinker / EMIL ARNOLD GmbH & Co. KG

<p>Emil Arnold GmbH & Co KG has stood for the production of high-quality tools for more than 75 years. Efficient quality control is a very important aspect of this. This is only possible with a reliable partner with whom customised solutions can be developed. Emil Arnold relies on its long-standing partnership with Werth Messtechnik. And that pays off – especially when you think outside the box.</p>
File size: 506.3 kB
Issue: QE 2018/03
Lateral thinker / EMIL ARNOLD GmbH & Co. KG

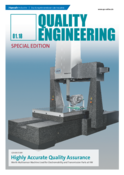
Highly accurate quality assurance– Werth multi-sensor systems in use for e-drive and transmission parts at VW / Volkswagen AG

<p>With the increased emergence of electromobility, the measuring tasks in the pre-series centre at the VW plant in Kassel have become even more diverse. In order to fulfil these requirements as efficiently as possible, the metrology engineers have been using a Video Check DZ HA 3D coordinate measuring machine from Werth for the past two years.</p>
File size: 8.06 MB
Issue: QE 2018/01
Highly accurate quality assurance– Werth multi-sensor systems in use for e-drive and transmission parts at VW / Volkswagen AG

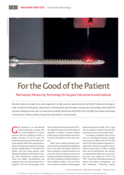
For the good of the patient – Multi-sensor systems for surgical tools and implants / Gebr. Brasseler GmbH & Co. KG

<p>No other industry is subject to such stringent regulatory requirements and customer demands as medical technology. In order to fulfil all quality requirements, Gebr. Brasseler relies on state-of-the-art metrology, which is integrated into the company's digital process chain on the software side. By networking with CAD, CAM and CAQ, the medical technology specialists are able to deliver the highest quality and still be quick to market.</p>
File size: 2.63 MB
Issue: QZ 2017/01
For the good of the patient – Multi-sensor systems for surgical tools and implants / Gebr. Brasseler GmbH & Co. KG

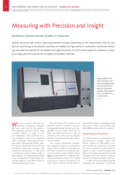
Measurement with precision and insight – Multi-sensor systems monitor quality in production / Julius Blum GmbH

<p>In quality assurance, different measuring machine concepts are used depending on the measuring task: extremely fast machines are required for production monitoring and highly accurate multisensor coordinate measuring machines are needed for workpieces with tight tolerances. For first article inspection, on the other hand, computed tomography scores highly with the complete capture of the workpiece.</p>
File size: 2.01 MB
Measurement with precision and insight – Multi-sensor systems monitor quality in production / Julius Blum GmbH

Faster to market– Coordinate metrology with CT accelerates the development process / TE Connectivity

<p>High quality and short development times– These requirements characterise the automotive industry. TE Connectivity's Automotive Competence Centre has been using Werth coordinate metrology with computed tomography for two years and has been able to significantly shorten development times as a result.</p>
File size: 619.37 kB
Issue: QE 2015/09
Faster to market– Coordinate metrology with CT accelerates the development process / TE Connectivity

Metrology for the future – Multi-sensor systems create the basis for zero-defect production / ERNI Production GmbH

<p>Electronic components such as connectors are becoming ever smaller and therefore pose ever greater challenges for production. ERNI Electronics safeguards the manufacturing processes with 3D CNC multi-sensor measuring machines, one of which is capable of X-ray computed tomography. Modern metrology enables fast process validation.</p>
File size: 2.01 MB
Issue: QZ 2015/05
Metrology for the future – Multi-sensor systems create the basis for zero-defect production / ERNI Production GmbH

Measurement at the limit: It (almost) doesn't get any smaller – Coordinate measuring machine – Tool measurement – multi-sensor systems / Zecha GmbH

<p>The production of micro-tools requires special metrology. Where no eye can recognise the geometries, high-end measuring machines are required for both visual inspection and fully automatic production monitoring.</p>
File size: 1.9 MB
Issue: QZ 2015/04
Measurement at the limit: It (almost) doesn't get any smaller – Coordinate measuring machine – Tool measurement – multi-sensor systems / Zecha GmbH

When other measuring methods fail / Maxon Motor AG

<p>How can the quality of small planetary gears for micro drive systems be assured? This is made possible by the combination of a multi-sensor coordinate measuring machine, a FASERTASTER and special software –, which allows measurements to be taken in scanning mode, even in the tooth flanks, in accordance with standards and highly accurate.</p>
File size: 652.75 kB
Issue: Mikroproduktion 2015/02
When other measuring methods fail / Maxon Motor AG

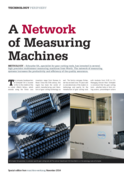
Network of measuring machines / Schnyder SA

<p>Schnyder SA, a specialist in gear cutting tools, has invested in several highly accurate multi-sensor measuring devices from Werth. The networked measuring systems increase productivity and the efficiency of quality assurance.</p>
File size: 5.33 MB
Issue: Sonderdruck 2014
Network of measuring machines / Schnyder SA

When optical sensors work hand in hand – Multi-sensor systems in quality assurance at Kleiner Stanztechnik / Kleiner GmbH

<p>Kleiner Stanztechnik plans and manufactures the tools required for the production of its precision punched parts in-house. This makes a decisive contribution to the quality of the components produced. The highly accurate Werth Video Check HA multi-sensor measuring device provides – precise measurement results of the three-dimensional shape of the tools and components using various optical sensors adapted to the measuring task –.</p>
File size: 1.31 MB
Issue: Sonderdruck 2014
When optical sensors work hand in hand – Multi-sensor systems in quality assurance at Kleiner Stanztechnik / Kleiner GmbH

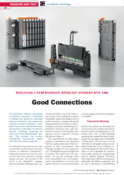
Good connection – Creating a consistent measurement technology standard with CMM / Weidmüller Interface GmbH & Co. KG

<p>Weidmüller, the Detmold-based specialist for connection technology, wants to move away from manual to automated operator self-inspection. The company has therefore recently developed a standard for geometric measuring tasks and analyses based on a 3D coordinate measuring machine from Werth Messtechnik, Giessen. This ensures exact, reproducible measurement results from the laboratory to series production.</p>
File size: 1.89 MB
Issue: QZ 2014/05
Good connection – Creating a consistent measurement technology standard with CMM / Weidmüller Interface GmbH & Co. KG

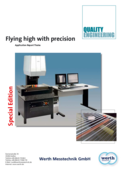
Flying high with precision – Optimising wire processing with multisensor coordinate measuring machines / Thales Electronic Systems GmbH

<p>The highest quality and reliability are essential for Thales Electronic Systems in the manufacture of travelling wave tubes for satellite signal amplification. 3D coordinate measuring machines from Werth Messtechnik are used in the production of the core components, the helix-shaped wire coils: they reliably detect even the smallest tolerance deviations.</p>
File size: 132.3 kB
Issue: QE 2014/01
Flying high with precision – Optimising wire processing with multisensor coordinate measuring machines / Thales Electronic Systems GmbH

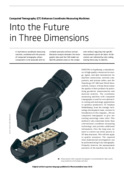
Three-dimensionally into the future – Computed tomography (CT) complements coordinate measuring machines / Harting KGaA

<p>A multi-sensor coordinate measuring machine combined with the process of computer tomography enables components to be analysed without contact and with micrometre precision. Nominal/actual comparisons between CAD and tomographically determined data allow problem zones on the component to be recognised without having to create special measurement points. All deviations are colour-coded and can be quickly identified.</p>
File size: 330.85 kB
Issue: Plastverarbeiter 2012/10
Three-dimensionally into the future – Computed tomography (CT) complements coordinate measuring machines / Harting KGaA

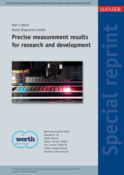
Precise measurement results for research and development – Coordinate measuring machine determines geometry and layer thickness of micro-structures / Roche Diagnostics GmbH

<p>Complex individual measurements on its diagnostic devices were increasingly causing a manufacturer to run out of time and resources. Now, a multisensor coordinate measuring machine equipped with an image processing and a confocal sensor is being used in technology development. The machine determines the geometry and layer thicknesses of microstructure functional samples, in some cases during the manufacturing process.</p>
File size: 1.35 MB
Issue: QZ 2012/05
Precise measurement results for research and development – Coordinate measuring machine determines geometry and layer thickness of micro-structures / Roche Diagnostics GmbH
Contact us
Select a different country or region to see content in your language.