learn more

Professional article

Background knowledge on the function and use of multi-sensor systems and computed tomography

Accumulated knowledge based on decades of experience with optics, probe, computed tomography and multi-sensor systems supports users in the successful use of their coordinate measuring machines for flexible, safe and traceable 3D measurements according to international standards.

Professional article
Filter

Complete external and internal measurement – X-ray tomography in coordinate metrology

<p>BASICS PART 3 In coordinate metrology, tactile and optical sensors and X-ray computed tomography are predominantly used. X-ray tomography machines differ in their basis and components such as X-ray source, rotary axis and detector as well as in their software and thus in their properties, the basic understanding of which is helpful for optimising their use. Spatially extended objects, including their internal structures, can be fully captured by metrology.</p>
File size: 2.49 MB
Issue: QZ 2020/02
Complete external and internal measurement – X-ray tomography in coordinate metrology

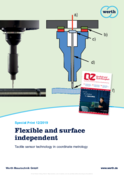
Flexible and surface-independent– Tactile sensors in coordinate metrology

<p>BASICS PART 2 Tactile and optical sensors as well as X-ray computed tomography are predominantly used in coordinate metrology. Tactile sensors differ in their functional principle and structure consisting of mechanics, optics, electronics and software and thus in their properties, the basic understanding of which is helpful for optimising their use. Tactile measurement is largely independent of the surface properties of the objects to be measured.</p>
File size: 2.2 MB
Issue: QZ 2019/12
Flexible and surface-independent– Tactile sensors in coordinate metrology

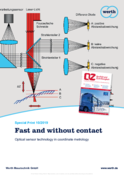
Non-contact and fast – Optical sensors in coordinate metrology

<p>BASICS Part 1 In coordinate metrology, tactile and optical sensors and X-ray computed tomography are predominantly used. Optical sensors differ in terms of their functional principle and structure consisting of mechanics, optics, electronics and software and thus in their properties, the basic understanding of which is helpful for optimising their use. Sensitive workpieces and those with small features can also be measured without contact.</p>
File size: 3.01 MB
Issue: QZ 2019/10
Non-contact and fast – Optical sensors in coordinate metrology

Multi-sensor or X-ray tomography – The measuring task determines the choice of coordinate measuring machine

<p>For efficient use of coordinate metrology in quality assurance, the measuring machine of the right accuracy class and size must be equipped with the appropriate sensor or multi-sensor systems. It often makes sense to combine non-contact sensors with tactile sensors. However, the suitability of the sensor for the measurement task depends on various criteria.</p>
File size: 1.82 MB
Issue: QZ 2018/04
Multi-sensor or X-ray tomography – The measuring task determines the choice of coordinate measuring machine

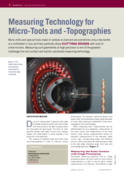
Micro tools and topographies in all facets

<p>Micro-mills and special tools made of carbide or diamond are sometimes only a few tenths of a millimetre in size and have CUTTING EDGES with perfect sharpness and radii of just a few micrometres. The measurement of such geometries is one of the greatest challenges for non-contact and tactile coordinate metrology.</p>
File size: 1.19 MB
Issue: Mikroproduktion 2017/02
Micro tools and topographies in all facets

With high accuracy and speed – Topography scanning with new Chromatic Focus Line sensor

<p>Multidimensional distance sensors enable higher point densities or measuring speeds than point sensors. However, this is often at the expense of increased measurement uncertainty. The new Chromatic Focus Line sensor CFL realises the two major challenges of metrology simultaneously.</p>
File size: 4.23 MB
Issue: QE 2017/01
With high accuracy and speed – Topography scanning with new Chromatic Focus Line sensor

Spoilt for choice – Different sensors in practical use

<p>Modern coordinate measuring technology offers the optimum sensor for practically every measuring task. Different measuring tasks on the same workpiece can usually be solved most efficiently with multisensor coordinate measuring machines.</p>
File size: 3.75 MB
Issue: QE 2016/04
Spoilt for choice – Different sensors in practical use

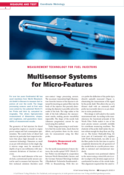
Multi-sensor systems for micro-features – Metrology for fuel injectors

<p>For over ten years, Continental AG has been using machines from Werth Messtechnik GmbH, Giessen, for the measurement of fuel injection nozzles worldwide. The image processing sensor technology initially used was soon supplemented by the patented Werth fiber probe and later by computed tomography. This enables the highly accurate measurement of size, mould and Roughness and guarantees the traceability of the measurement results.</p>
File size: 1.81 MB
Issue: QZ 2015/09
Multi-sensor systems for micro-features – Metrology for fuel injectors

Complete and non-destructive – Ten years of computed tomography in coordinate metrology

<p>Thanks to the possibility of complete and non-destructive measurement of components with any structure, it is hard to imagine quality assurance without computed tomography. In the ten years since this technology was introduced to coordinate metrology, Werth has developed a wide range of machines and functions for the increasing range of measurement tasks.</p>
File size: 456.23 kB
Issue: QE 2015/01
Complete and non-destructive – Ten years of computed tomography in coordinate metrology

Flexible and accurate measurement – Artefact correction in computed tomography

<p>When measuring with computed tomography, various artefacts occur depending on the principle. Various methods are available to correct the resulting measurement errors. The most suitable method can be selected depending on the measurement task in question.</p>
File size: 1.94 MB
Issue: QZ 2014/11
Flexible and accurate measurement – Artefact correction in computed tomography

Confidence in the technology must mature – X-ray tomography, the future of coordinate metrology?

<p>In recent years, X-ray tomography has found its way into the laboratories of many companies. Suddenly, data recording on the workpiece seems to be very simple and uncomplicated, and the long-cherished wish of metrology experts "measurement without programming" is becoming a reality. But what exactly is a coordinate measuring machine with X-ray tomography sensors and what is the current state of the art?</p>
File size: 1.74 MB
Issue: QZ 2013/05
Confidence in the technology must mature – X-ray tomography, the future of coordinate metrology?

Why micro tools have to be so precise

<p>In micro-milling, even the smallest deviations can disrupt the process and drive up costs. This is why extreme demands are placed on the extremely precise and expensive tools. Quality monitoring is carried out using high-precision optical or optotactile measuring machines.</p>
File size: 5.99 MB
Issue: Mikroproduktion 2011/02
Why micro tools have to be so precise

Multi-point measurement in coordinate metrology – Modern sensors allow the complete capture of the workpiece geometry

<p>Modern coordinate measuring machines can be equipped with various sensors. In addition to tactile sensors, optical sensors are becoming increasingly popular. Here, large numbers of measurement points can be obtained on the material surface in a short measuring time. This allows a complete evaluation of mould, size and position. Even more far-reaching possibilities are offered by the complete capture of workpieces using computed tomography.</p>
File size: 326.81 kB
Issue: QE 2010/05
Multi-point measurement in coordinate metrology – Modern sensors allow the complete capture of the workpiece geometry

Profiles on the conveyor belt – Topography measurement with optical sensors

<p>Modern coordinate measuring machines can be equipped with various sensors. In addition to traditional tactile sensors, optical sensors are becoming increasingly popular. Here, large numbers of measurement points can be obtained on the material surface in a short measuring time. This allows a complete evaluation of mould, size and position.</p>
File size: 1.72 MB
Issue: Laser + Photonik 2010/04
Profiles on the conveyor belt – Topography measurement with optical sensors
Contact us
Select a different country or region to see content in your language.