• Home
  • Latest news
  • Höchste Genauigkeit: Einmessen von Geometriekorrekturen
learn more
Economical measurement with computed tomography

Highest accuracy: Qualifying geometry corrections

Highest accuracy: Qualifying geometry corrections

In addition to the highest demands on the device components, new procedures for qualifying the TomoScope® device geometry have been developed. The use of traceable calibration standards ensures the traceability of measurements on real workpieces.

The deviations of the device axes are determined to eliminate systematic measurement errors. The deviations determined during this calibration process are automatically corrected by the software during measurements on real workpieces. The Werth TomoScope® series are measuring machines with full error correction. The calibration process is the responsibility of the manufacturer.
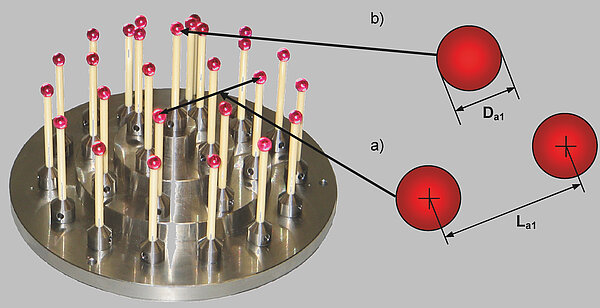
When the coordinate measuring system is accepted, the measurement errors to the calibration value are checked by calibration standards. The use of traceable calibration standards ensures the traceability of measurements on real workpieces. If the measurement errors are within the maximum values specified by the manufacturer, conformity with the specification is proven and traceability is ensured. When determining the length measurement error via ball center distances, many systematic measurement errors cancel each other out. For a complete check, the deviation of a two-point diameter must therefore be added or measured bidirectionally.
Coordinate measuring machines are checked according to DIN EN ISO 10360 and the VDI/VDE 2617 guideline. The measurement uncertainty must also be specified for calibration. To ensure that both are carried out in accordance with the standards, the manufacturer or calibration laboratory should have a certificate from the national accreditation body DAkkS.

Contact us
Select a different country or region to see content in your language.