With high speed and precision, workpieces can be fully captured by X-ray computed tomography. For measurements in parallel with production, however, this method has often been too slow. A new type of machine now combines the advantages of various classes of machines.

In X-ray computed tomography (CT), the workpiece is rotated about its own axis and thus penetrated by X-rays from various directions. Measurement software takes the 2D radiographic images that this generates and uses them to reconstruct the three-dimensional workpiece volume, including interior geometries. In comparison with conventional sensors, this method provides very high-density information. The measurement process also produces artifacts that lead to systematic measurement deviations. Therefore, the first objective of advancements in CT technology was to reduce measurement deviations by correcting artifacts induced by the principle of CT.

At the beginning of the 21st century, the first CT machine developed especially for coordinate measuring technology, the Werth TomoScope, enabled dimensional measurements at a precision that matched that of conventional coordinate measuring machines. Werth Autocorrection, the most precise method for correcting artifacts down to the sub-micron level, corrects CT measurements using a reference measurement of a master part taken with high-precision sensors, such as the Werth Fiber Probe. For multisensor coordinate measuring machines with a CT sensor, this can be performed on the same machine. Methods for correcting artifacts in software, such as on a simulation basis, allow sufficiently precise measurements with computed tomography alone for most applications.

The range of applications has been expanded by increasing resolution, using special measurement methods such as Raster Tomography and Multi-ROI CT. With Raster Tomography, different areas of the workpiece are scanned individually and merged to reconstruct the workpiece volume. Multi-ROI CT uses a patented process to measure selected zones (regions of interest, abbreviated ROI) of the workpiece at high resolution. Machines that combine high-resolution detectors and transmission target X-ray tubes with very small focal points ensure that large workpieces and materials that are difficult to penetrate can be measured at high resolution. Dual-Spectra Tomography is a new software tool that allows measurement of workpieces made of multiple materials, such as assembled plug connectors.

With the TomoScope XS, Werth has implemented a machine concept that combines the benefits of various conventional machines and avoids their disadvantages. In the past, there were two variants to choose from with respect to microfocus X-ray tubes: closed tubes, which need to be replaced after a few years, or open X-ray sources, which require maintenance several times a year. This results in relatively frequent downtime and high maintenance costs.

X-Ray Technology Combines Advantages of Open and Closed Microfocus X-Ray Tubes

The X-ray technology of the TomoScope XS uses a series of innovations to combine the advantages of open and closed microfocus X-ray tubes. The machine is equipped with a highly accurate transmission target X-ray tube. The monoblock design of tube, generator, and vacuum system has been implemented in an open structure. This allows both longer maintenance intervals and effectively unlimited service life. Downtime and operating costs are minimized. While the monoblock design has previously been reserved for reflection-target X-ray tubes, the transmission-target X-ray tube allows rapid measurements at high resolution, now at low cost as well.

The open structure means that high X-ray voltages of up to 160 kV are possible with monoblock X-ray tubes. This means that workpieces made of denser materials and long radiographic lengths can also be measured at low cost. A high-precision air bearing rotary axis is another foundation for very detailed volumes and precise measurement results. Due to its compact design and associated low space requirements and low weight, the machine can be set up nearly anywhere. Low procurement and operating costs mean fast amortization. This means that a compact, low-cost CT coordinate measuring machine is available, with DAkkS calibration in conformance with standards. The machine concept allows broad usage of CT sensors for various workpieces and tasks at the company. Typical application examples are first article inspections or series measurements in parallel with production of complex plastic parts, such as plug connectors, housings, spray cans, or components such as covers and bottle necks.

Reference points are commonly on the outside, while geometric features are internal. In such cases, measurement with conventional sensors is only possible by taking several steps, repositioning the workpiece, and using expensive customized fixtures. Here the CT sensor enables the geometry to be captured completely, with a large number of points for CAD analysis, simple measurement of shape and position according to the new ISO 1101, and capture of free-form surfaces. The high information content allows efficient correction of injection molds. A patented method is used to perform a nominal-to-actual comparison and the calculated deviations are shown relative to the specified data set.

In addition to procurement and maintenance costs, along with the size and weight of the machines, computed tomography has commonly been too slow for measuring during production. There are various methods for reducing measurement time; these generally result in reduced quality of the data. They include increasing the power of the X-rays, at the cost of resolution; reducing the distance between the tube and the detector, which increases cone beam artifacts; or shorter exposure time, meaning reduced dynamic range.

OnTheFly Operating Mode Avoids Dead Time While Positioning the Workpiece

The TomoScope XS also includes the new OnTheFly operating mode. Dead times that would otherwise occur while positioning the workpiece are avoided by continuously rotating the machine axis. In conventional start-stop operation, the rotary motion is interrupted to record each radiographic image, with continuous exposure, so that no motion blur occurs. For On-The-Fly computed tomography, extremely short exposure times are used to minimize motion blur.

Using an increased number of rotary increments, about 10,000 radiographic images are typically generated in a few minutes and reconstructed to produce a volume, achieving the same low measurement uncertainty as in start-stop operation. Specification to VDI/VDE 2617 Page 13 and traceability of measurement results remain unaffected, despite speeding up the measurement process considerably.

With this method, either the measurement time can be reduced to a tenth of its previous value, with the same data quality, or the data quality can be increased for the same measurement time. Special measurement methods such as Raster and ROI Tomography, or a higher detector resolution, provide workpiece volumes at high resolution and better signal-to-noise ratio. With the increase in measurement time, the results from conventional CT measurements can be compensated for with OnTheFly CT. Using WinWerth measurement software, the workpiece volume is reconstructed in real time and is available immediately after measurement.

The new technologies open up new fields of application to computed tomography with strict measurement time specifications for a given data quality. One example from medical technology is process-integrated measurements of dental implants or bone screws, which have complex internal geometries such as internal threads and small radii. Such details can only be measured at high resolution and high measuring speed with a transmission target X-ray tube. Depending on the size and material of the workpiece, 160 kV of X-ray voltage are required. Dental implants made of steel as well as titanium can be measured. For titanium dental implants, OnTheFly CT has a measurement time of 2 minutes, in comparison with 15 to 20 minutes for the conventional operating mode.

Automation of Computed Tomography Using a Workpiece Changing System

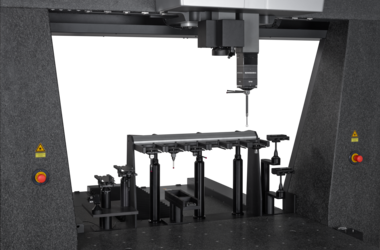
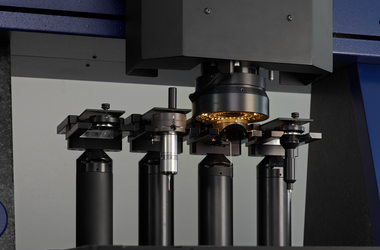
For in-line measurements, coordinate measuring machines with CT sensors can be completely automated. The TomoScope XS can thus be loaded by a robot. Another option is to integrate a workpiece changing system for transporting the workpieces into the measuring range, one after the other, using the machine axes. The workpiece changing system is located within the radiation shielding of the machine, so that parts can be measured during the night or on weekends.

With automated changing systems, the set-up times for CT machines are minimized, and the X-ray tubes do not need to be switched on and off and warmed up again for every workpiece. Automated CT measurements are useful, for example, for process monitoring for injection molds. Using the workpiece measurements, the functionality and wear of the tool can be examined. The workpieces are checked, for example, for signs of tool blowouts or burrs. For injection molds for small parts in particular, a high number of cavities, 32 or 64, is typical.

Due to their small size, handling of such workpieces and producing suitable fixtures can be difficult. Therefore the inspection for tool breakouts is often performed in parallel with the process, using a microscope. Such a visual inspection, however, depends greatly on the operator and is therefore subject to error. A multi-cavity measurement using the TomoScope XS is now available as an alternative. Several workpieces can be measured at the same time and the point clouds separated automatically.

The high resolution at high power means that the TomoScope XS can be used to inexpensively measure many different workpieces: here, 18 cable carrier links for a joint multi-cavity measurement. Images: Werth

For process-integrated measurements and 3-shift operation, an automated workpiece changing system can be integrated inside the radiation shield of the CT machine.

Reducing measurement time by up to ten times – for example, two minutes for complex plastic injection molded parts – enables OnTheFly CT measurements in parallel with production at a high throughput rate.

Using the measurement point cloud, dimensions can be determined and a nominal-to-actual comparison can be made using a color-coded deviation plot.